You must read the blog of "Cluster and Shared SCSI Bus" first.

Install SQL Server 2005
Components to Install
SQL Server Database Services
Create a SQL Server failover cluster (selected)
Workstation components, books online and development tools
Default Instance
Virtual Server Name:MYSQL
Virtual Server Configuration:
Network to use: Public
IP address: 24.80.99.181 255.255.252.0
Cluster Group Selection—Select the cluster group where the virtual server resources will be installed.
Cluster Group
QuorumGroup
Data file will be created in Y:\Microsoft SQL Server\
Cluster Node Configuration
--Selected nodes:Node2
--Required Node:Node1
Service Account for SQL server, SQL Agent, browser: VIP\SQLserver
VIP\SQLserverGroup, VIP\SQLagentGroup, and VIP\SQLfulltextGroup are used.
Within a cluster, SQL Server instance can run on any physical machine. Local Windows groups do not have a valid SID across machine. When you install a SQL server failover, the installation does not assume that you have the authority to create groups in the domain. So, you must create the three domain Windows groups before you install failover SQL server. During the installation, when you specify the three groups, the necessary permissions are granted to the three groups and the service account will be assigned as a member of the corresponding group.
I found that SQL Server was installed on both nodes. That is different from installation of exchange server 2003, which needs to be installed twice.
Problem:
Drive Y is not accessible from SQL Server Management Studio. Why? From Disk Management Console, I notice that there was no drive letter assigned to the drive. After I assign the letter Y, the drive Y can fail over and fail back. However, SQL Server Management Studio still can not access it. I uninstall SQL Server and reinstall it. Drive Y is available during the installation procedure.
Turn off both Node1 and Node2;
Create a fixed virtual Hard Disk, named.vhd (800MB);Create a virtual SCSI adapter and connect it to named.vhd on node1 computer;
create a virtual SCSI adapter and connect it to named.vhd on node2 computer;Turn on Node1 and open Disk Management console to initialize the newly created disk (don't convert it to dynamic); Format it as NTFS and assign Drive letter W;
Turn off Node1 and turn on Node2; Open DISK MANAGEMENT console to check the newly installed disk; nothing else to be done;Turn on Node1 (both nodes are on)
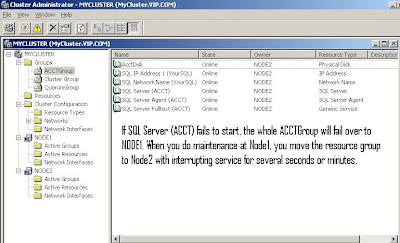
At Node1, Cluster Administrator consolecreate a resource group: AcctGroup
Create a resource: AcctDisk (Physical Disk type) with the association to the drive W;Install SQL Server 2005 as a named instance--ACCT
Virtual Server Name: YourSQLPublic IP: 24.80.99.182
Pay attention to the Cluster Group Selection, ACCTGROUP and QUORUMgroup are listed in available cluster groups; whereas the unavailable cluster group includes the CLUSTER GROUP--because the CLUSTER GROUP already has a virtual SQL server;Select ACCTGROUP, the data file has the path of W:\Microsoft SQL Server\
YourSQL\ACCT named instance is installed.Test the connection to two instances
Inside the cluster (node1 hosts both instances),SQLCMD -S mySQL --Success
SQLCMD -S YourSQL\Acct --SuccessFrom Host Computer (with Workstation Components installed),
Node1 hosts the two instances
- SQLCMD -S MySQL --Success
- SQLCMD -S YourSQL\Acct --Success
Create an alias for connection to YourSQL\ACCT: SQLCMD -S xxx ---OK
Summary:
- If resource A depends on resource B, both A and B must be in same resource group.
- Resource is a logical representation of components, software and hardware, in a system. A virtual server builds on those resources.
- In a computer, many things can go wrong. For example, If antivirus software can prevent a system from starting quickly, another node in the cluster will take over.
- We talk about RAID 1, 10, 01, and 5 a lot. They are hardware fault tolerance strategies. You can implement them for quorum (RAID 1) and Data (RAID 5 or RAID 10). The Cluster implementation is a software fault tolerance strategy. If a disk (attached on Shared SCSI BUS and which the virtual server relies on) goes wrong, no node can run the virtual server.
- Cluster uses share-nothing strategy.

 The warning message does not matter. This is because all the shared disks are currently owned by Node1. Microsoft Cluster uses the share-nothing architecture. Node2 does not have access to the shared storage at the moment.
 One IDE hard drive with 3 partitions (C:, E:, F:). Host Operating System is installed in C: drive.
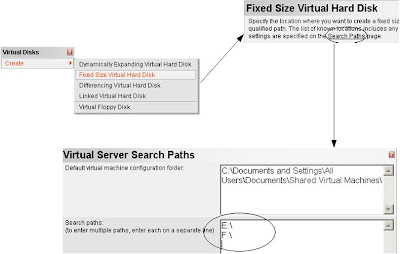 Create three virtual disks:

 Make sure that the Virtual Machine has its CD/DVD bound to the Physical CD/DVD.
 Click "Configure Vmachine1";

 USE MASTER
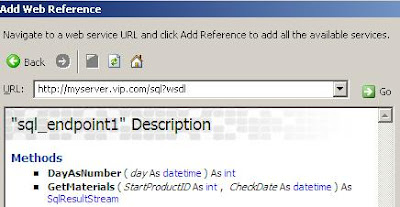
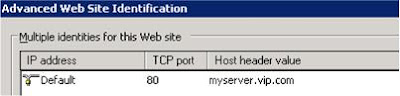
 However, if you test the http endpoint from Firefox 2.0, you get the following error:
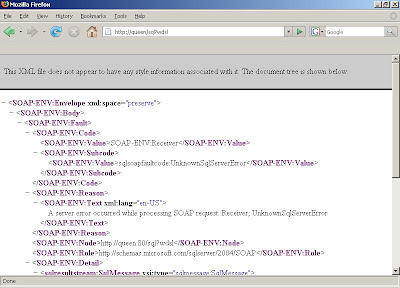 To delete a namespace:
 Make sure that the same name is used in the above two screenshots.
 Check the Default Snapshot Folder: the snapshot files are created.


 It gets the desired result.


